Free Delivery over $50

Fast and free to your door

Exclusive Savings

On your favourite brands

145+ Five Star Reviews

Customer Satisfaction Garunteed

chevron_left chevron_right

Chocolate

Recipes

Filters

Clear all

Brand

Category

Occasion

Tony’s Chocolonely Meringue Gingerbread Pie

Tony’s Chocolonely Meringue Gingerbread Pie

GINGERBREAD PASTRY ⅓ Hakanoa Gingerbread recipe2 T soft butter for the pan and rubbing into the gingerbread70 g crystalized ginger, finely chopped THE FILLING 170 g Tony’s Chocolonely 70% dark chocolate, finely chopped120 g soft butter45 g caster sugar2 eggs2 egg yolks1 T vanilla essence or a splash of rum if that’s your thing!60 g sifted flour THE MERINGUE 3 egg whites200 g caster sugar1 t corn flour1 t ginger powder, sifted1 t vanilla essence½ t white vinegar1 T cacao powder, sifted TO SERVE A large handful of Fresh As freeze dried raspberriesSifted cacao powderCream if you wish! METHOD Press the ginger bread into your well greased Lil’ Legacy Pan. Push the gingerbread up a little higher than the pan’s rim. Rub the gingerbread liberally with soft butter then prick with a fork and chill for 20 minutes. Cut out a circle of baking paper larger than the pan, crumple it up and place on top of the gingerbread. Fill with rice or baking beans and bake at 180C for 12 minutes. Remove paper and rice/beans and return to oven for 5 minutes. The ginger bread should feel dry to the touch. Remove from the oven and sprinkle the crust with crystallised ginger. Trim excess pastry by running a knife around the rim of the pan. And leave to cool as you make the filling. Melt the butter and chocolate together over a bain marie (bowl over boiling water) and set aside to cool a little. Beat whole eggs and egg yolks with sugar and vanilla or rum until frothy and pale. Fold in the flour then the melted chocolate and butter and mix well. Pour batter into your prepared cool gingerbread pastry case and bake for 15 minutes at 180°C. When you remove it from the oven, lower the temperature to 160°C. To make the meringue, beat the egg whites until they form stiff peaks. Whisk the sugar in a tablespoon at a time and when it’s all incorporated, beat for a further minute. Fold in the corn flour, vanilla and vinegar. Finally sprinkle the cacao powder and ginger powder on top but don’t mix it in. If you mix it in, the meringue will go brown. If you don’t mix it in you’ll end up with cacao/ginger layers amidst the white meringue. Pile, peak and swirl the meringue on top of the hot pie, making sure it connects with the inner edge of the pastry. Bake in the lower level of your oven for 25 minutes at 160°C. Or until just crunchy to the touch. Run a knife around the edge of the pastry when the pie is still hot so it’s easier to cut later. Leave to cool, then chill. Dust in cacao powder, a big sprinkle of crumbled freeze dried raspberries and serve with lashings of love and gratitude.

Read more

Tony's Chocolate fritters

Tony's Chocolate fritters

Ingredients:3 eggs1 tsp vanilla extract1/4 cup ricotta3/4 cup yogurt, whole milk1/4 cup honey 1/4 cup semolina flour3/4 cup all-purpose flour1/4 cup granulated sugar1 tbsp baking powder3/4 tsp saltjust a tiny pinch of ground cinnamon1 bar of Tony’s Chocoloney 70% dark chocolate, cut into small chunks Materials:WiskSmall bowlLarge bowlSpatulaSomethin' to cover your batter withSmall potIce cream scoop or spoonPaper towels Directions: Whisk together the eggs, vanilla, ricotta, yogurt, and honey in a small bowl. Set aside. Whisk together the semolina flour, all-purpose flour, granulated sugar, baking powder, salt, and cinnamon in a large bowl. Using a spatula, stir the flour mixture into the egg mixture until the dry ingredients are about halfway incorporated into the wet ingredients. Add some Tony’s and stir until all ingredients are evenly mixed. Let the batter sit for about an hour covered and at room temperature without stirring. Why? While the batter sits, the baking powder is activating, and making the mixture light and airy. So make sure not to stir, unless you like flat desserts, of course. In a small pot, heat a few inches of vegetable oil to 350 F. Carefully scoop golf ball size fritters a few at a time into the fry pot. Fry ‘em for about 2 minutes flipping the fritters halfway through. Drain on paper towels and, when cooled slightly, dust with powdered sugar. These are yummy on their own or served with orange curd, caramel, or (our favorite) chocolate sauce!

Read more

Tony's Chocolonely Whoopie! Pies

Tony's Chocolonely Whoopie! Pies

Whoopie! cookie Ingredients: ½ cup canola 1 ¾ cup sugar 4 oz Tony Chocolonely's dark or milk chocolate (2/3 of a big bar) 4 eggs 1 tsp vanilla extract 1 cup all purpose flour ¾ cup rye flour 2 Tbsp cocoa powder 2 Tbsp black cocoa powder (or regular cocoa) 1 ½ tsp baking powder 2 tsp kosher salt powdered sugar for rollin’ Buttercream ingredients: 2 egg whites ½ cup sugar Just a pinch of salt 2 oz Tony's Chocolonely milk chocolate (that's about 1/3 of a big bar) 2 Tbsp white sesame tahini Let's start with cookies In a double boiler melt the dark or milk chocolate so it’s ready for the coming steps. If ya don’t have a double broiler, a pot full of water with a glass or metal mixing bowl will do just fine! In a mixer with paddle attachment, mix the sugar and oil until nice ‘n combined. Now get your camera ready for some chocolate action, ‘cause it’s time to pour that melted chocolate in. You know, if ya hadn’t decided to use it as hot chocolate instead yet. Next, add eggs and vanilla one at a time. Mix ‘em up until they’re combined. Time to add in the dry ingredients! Mix them in until they’re just combined. Now that that’s done, your mixture should look like brownie batter, which is to say, very tempting. Put your batter in refrigerator at least 30 minutes - 1 hour, until it’s firm. Time to kick back and relax! If you’re looking for an activity to get you through the resting period, it’s just about the perfect amount of time to watch the Bitter Chocolate episode of Rotten on Netflix and learn a thing or two. Oh, and preheat your over to 350. To finish off your whoopie pie cookies, roll your cool dough into whatever ball size you’re lookin’ for. Then, roll your cookie ball in bowl of powdered sugar and bake ‘em at 350 for 10-12 minutes. Now for the buttercream Add egg whites, sugar, and salt in a heat proof bowl. Heat the mixture over a double boiler until the sugar is dissolved and the mixture is warmed through. Mix in a stance mixer (the mixer is real important here) with whisk attachment on high speed until meringue forms and the bowl is cool to the touch. Add butter slowly, scraping the bowl to make sure to get all that creaminess in there. Once the butter is fully incorporated, add melted chocolate and tahini. Salt to taste and seal with a chef’s kiss before enjoying.

Read more

tiny tony s’mores

tiny tony s’mores

What you’ll need:  mini Stroopwaffels or Belgian waffles  10 oz bag of large marshmallows  Tiny Tony’s - milk and/or dark  2 small, rimmed baking sheets lined with foil and sprayed with non-stick cooking spray  Instructions:  Begin by turning the broiler setting on your oven or toaster oven on.   Halve your marshmallows with a sharp knife sprayed with non-stick cooking spray. This’ll prevent the marshmallow from sticking to the knife. Place each half-cut side down onto pan.   Broil and rotate your marshmallows for about 2 minutes, until your marshmallows are as toasty as you’d like. Then, pull the sheet out and let your marshmallows cool for a few minutes.    Place either your mini Stroopwaffel or Belgian waffle piece on your other baking sheet. Now assemble your s’more with the marshmallows and Tiny Tony’s, topping with another Stroopwaffel or Belgian waffle (respectively) on top. For the final touch, you can place your baking sheet full of s’mores in a warm oven (325-350) for 2-3 minutes, until chocolate has just begun to melt.   Last, but not least, take out and dig in! 

Read more

Tony’s campfire cone s’mores

Tony’s campfire cone s’mores

What you’ll need:  10 oz bag marshmallows or mini marshmallows  Tony’s Chocolonely bar of your choice, broken into small pieces  waffle cones  tinfoil or eco foil  campfire or grill with golden hot embers!  Instructions:  Start by spreading out enough tinfoil or eco foil to comfortably fit a waffle cone (and then some) inside. Take your cone and stuff it to the brim with chocolate and marshmallows. Make a small pouch by folding your piece of foil tightly around the base of your cone, then more lightly around the top of the cone.   Place your foil pouch directly near the hot embers, but be careful, they’re real hot! Leave the pouch near your embers for about 30 seconds (or less!) to heat the s’more and melt all of the goodies inside.   Carefully remove your foil pouch from the embers (sticks or skewers helps here), leave to the side until cool to the touch. Once your foil is cool enough to touch, slowly uncover it from top to bottom, and dig in!  Hot tip: It’s a sticky situation! If you can set your foil pouch upright near your embers and remove/cool upright, it’ll help keep your cone from getting gooey and messy. 

Read more

Viral sun-melted chocolate strawberry snack hack

Viral sun-melted chocolate strawberry snack hack

How to make melt-in-the-sun chocolate dips with Tony’s ChocolonelyStrawberries, croissants, pretzels, and more.. meet your new favourite summer snack hack. What you’ll need:1 bar of Tony’s Chocolonely (any flavour you love.. milk caramel sea salt is always a winner!)A sunny spot (yep, really!)A plate, board or trayYour favourite dippables:Strawberries 🍓Pretzels 🥨Croissants 🥐Breads 🥖Banana slices 🍌Biscuits 🍪 Marshmallows☁️ Steps for the melt hack:Unwrap your Tony’s bar and place it on a plate or tray.Pop it in the sun, somewhere warm and direct. Let nature do the work for 10–20 minutes.Check the melt.. you want it soft and glossy, not fully melted.Dip away! Use your strawberries, pretzels, breads to scoop up the melty goodness.Snap a pic.. this one’s made for Instagram. Tag @tonyschocolonely_uk_ire and show us your summer snack setup!Tips: Want a neater dip? Score the bar into chunks before melting. Add a pinch of sea salt or crushed nuts for extra crunch. No sun? A few seconds in a warm car, a windowsill or in the microwave works too!Effortless.. Deliciously messy and perfect for sharing. Enjoy!  

Read more

Caramel Sea Salt Chocolate Chip Cookies - Cook & Nelson

Caramel Sea Salt Chocolate Chip Cookies

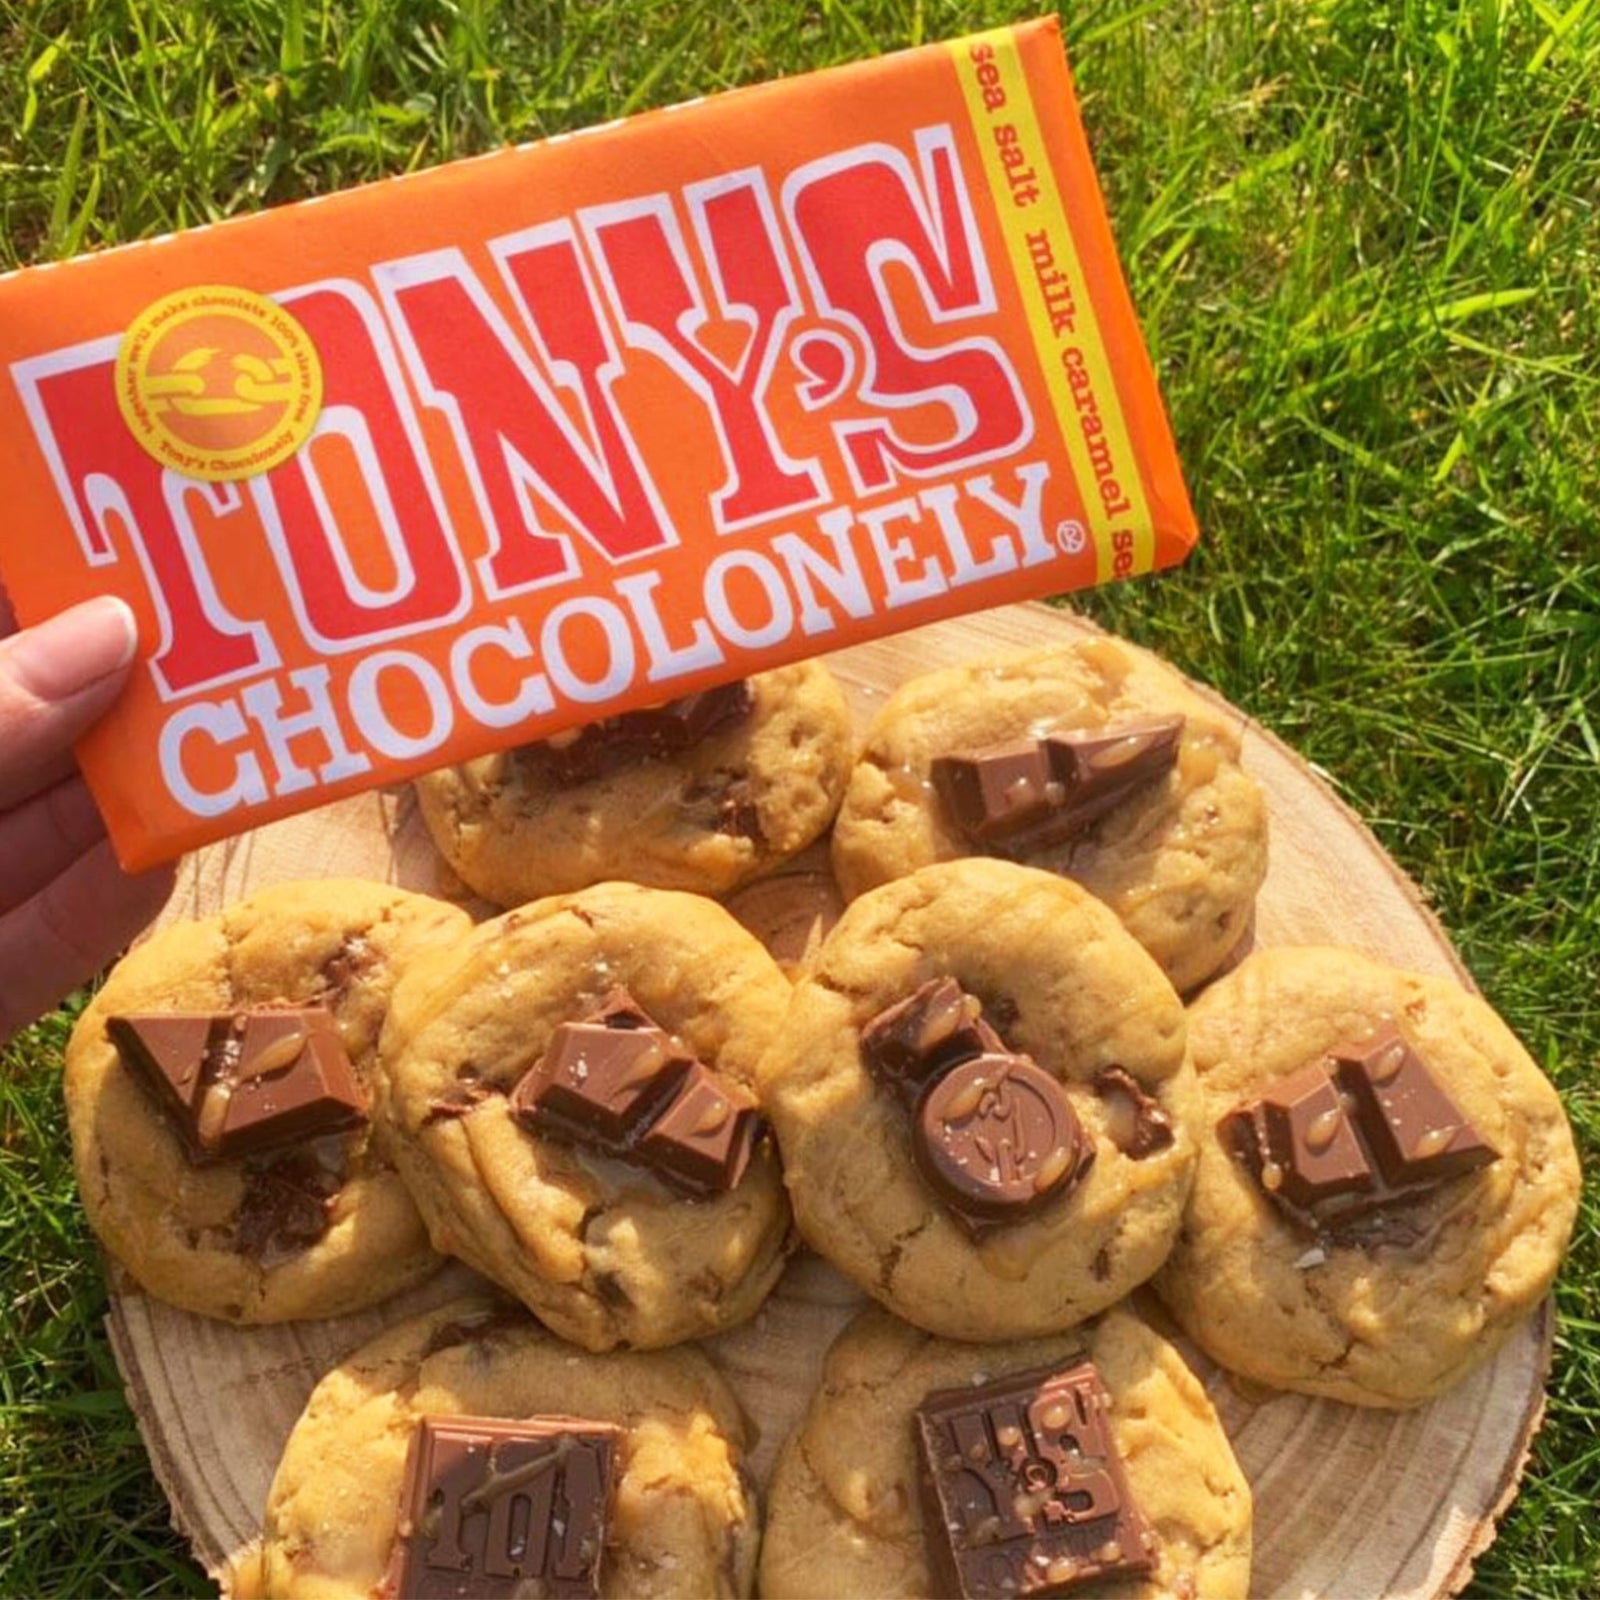
Looking for something to whip up this weekend? We think the only thing more delicious than chocolate chip cookies are these gooey-delicious caramel sea salt chocolate chip cookies. Special shout out to @‌beckybakes for this delish recipe.Ingredients 125g butter 100g light brown sugar 75g white granulated sugar 1 tsp salted caramel flavoring 300g plain flour 1 1/2 tsp baking powder 1/2 tsp bicarbonate of soda 1/2 tsp sea salt 1 Tony’s milk caramel sea salt bar, chopped into chunks Recipe Combine butter, light brown sugar & white granulated sugar in a bowl. Mix. Add the egg & salted caramel flavouring. Mix. Add the plain flour, baking powder, bicarbonate of soda & sea salt. Mix. Knead mixture into a dough & add the Tony’s chunks. Roll into 8 balls Freeze for 30 minutes (or up to 3 months if you want to keep some for later) Bake for 10-12 minutes at 180°C Decorate chunks of Tony’s Drizzle with salted caramel sauce Leave to cool for 30 minutes Admire your work. 🍪 And feast on your salty-sweet treats!

Read more

Peppermint Brownie Cookie Sandwiches - Cook & Nelson

Peppermint Brownie Cookie Sandwiches

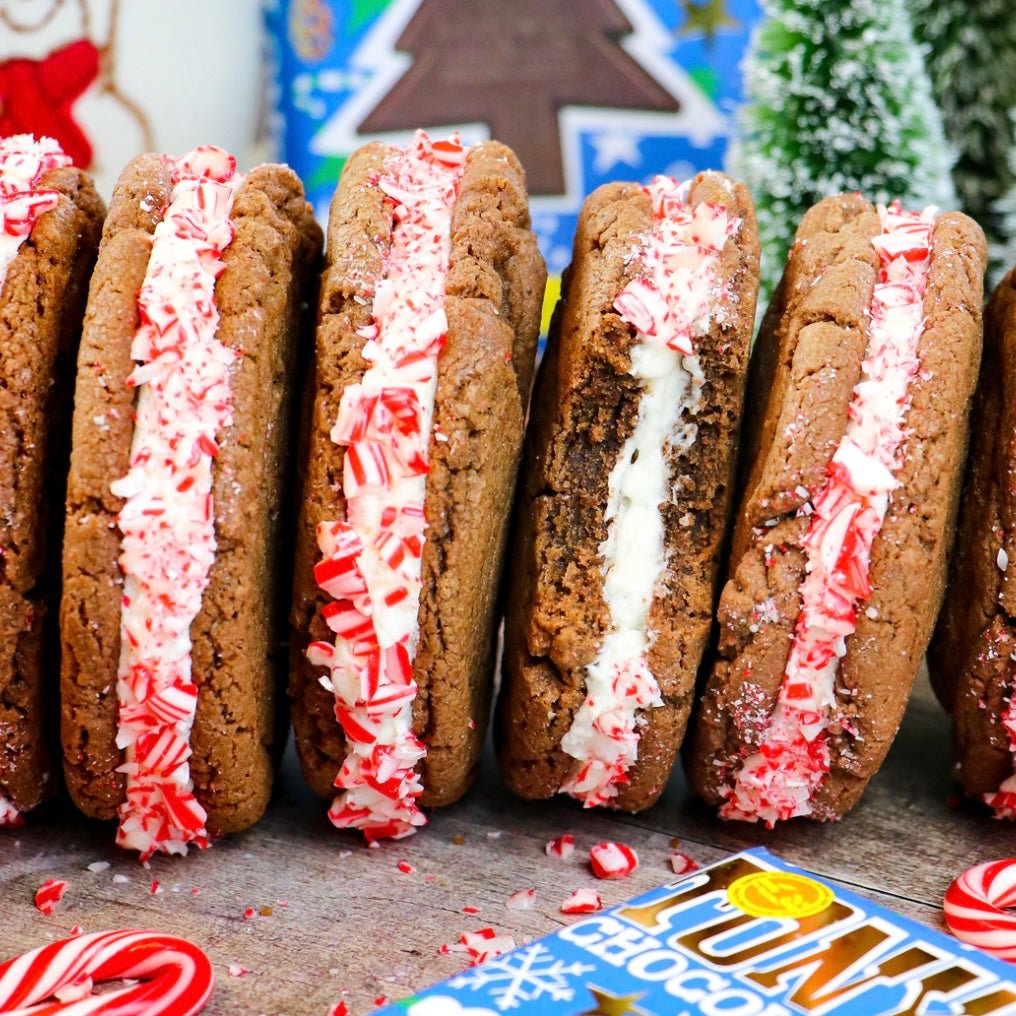
Warm, ooey-gooey rich chocolate goodness with sweet peppermint candy crunch. Could a cookie be any more festive? Trick question. Servings: 12Prep Time: 20 minCook Time: 10 minTotal Time: 30 minIngredients:For the Brownie Cookies 2 cups All Purpose Flour 1 tsp. Fine Sea Salt ¾ tsp. Baking Soda 1 cup Brown Sugar 1 180g Tony Chocolonely Dark Chocolate Candy Cane Bar, melted 10 tbsp. Unsalted Butter, softened 1 large Egg 1 Egg Yolk For the Peppermint Buttercream 12 tbsp. Unsalted Butter, softened 3-4 cups Powdered Sugar 1 tbsp. Milk 1 ¼ tsp. Peppermint Extract 1 tsp. Vanilla Extract ¼ cup Crushed Peppermint + more for decorating Method: In the bowl of a stand mixer, combine the butter and brown sugar. Beat for 2 minutes, until smooth. Add the egg, egg yolk, and melted chocolate. In a separate bowl, mix the flour, salt, and baking soda together. Add into the chocolate bowl and mix just until combined. Cover the cookie dough with saran wrap. Chill in the fridge for at least 30 minutes. Preheat oven to 375F. Line 1-2 large baking pans with parchment paper. Using 2 ½ - 3 tablespoon cookie dough each, place the cookie dough balls on the prepared pans leaving 2” space in between. Bake for 6-8 minutes, gently slam the cookie tray down on the stovetop to create that crinkle top. If the cookies are not set in the center, bake an additional 1-2 minutes. Let the cookies cool on the pan for 5 minutes before transferring to wire rack to cool completely. To make the buttercream: Add the softened butter in the bowl of a stand mixer. Beat for 1 minutes, until smooth. Add remaining ingredients and beat for 5-6 minutes, until light and fluffy. Transfer the peppermint buttercream to a piping bag to pipe onto half of the cookies. Top with another cookie and roll the edges in crushed peppermint to decorate. Enjoy! Share a picture of your Tony's Chocolonely creations by tagging us on Instagram @cookandnelson.

Read more

Rocky Road with Tony’s Chocolonely - Cook & Nelson

Rocky Road with Tony’s Chocolonely

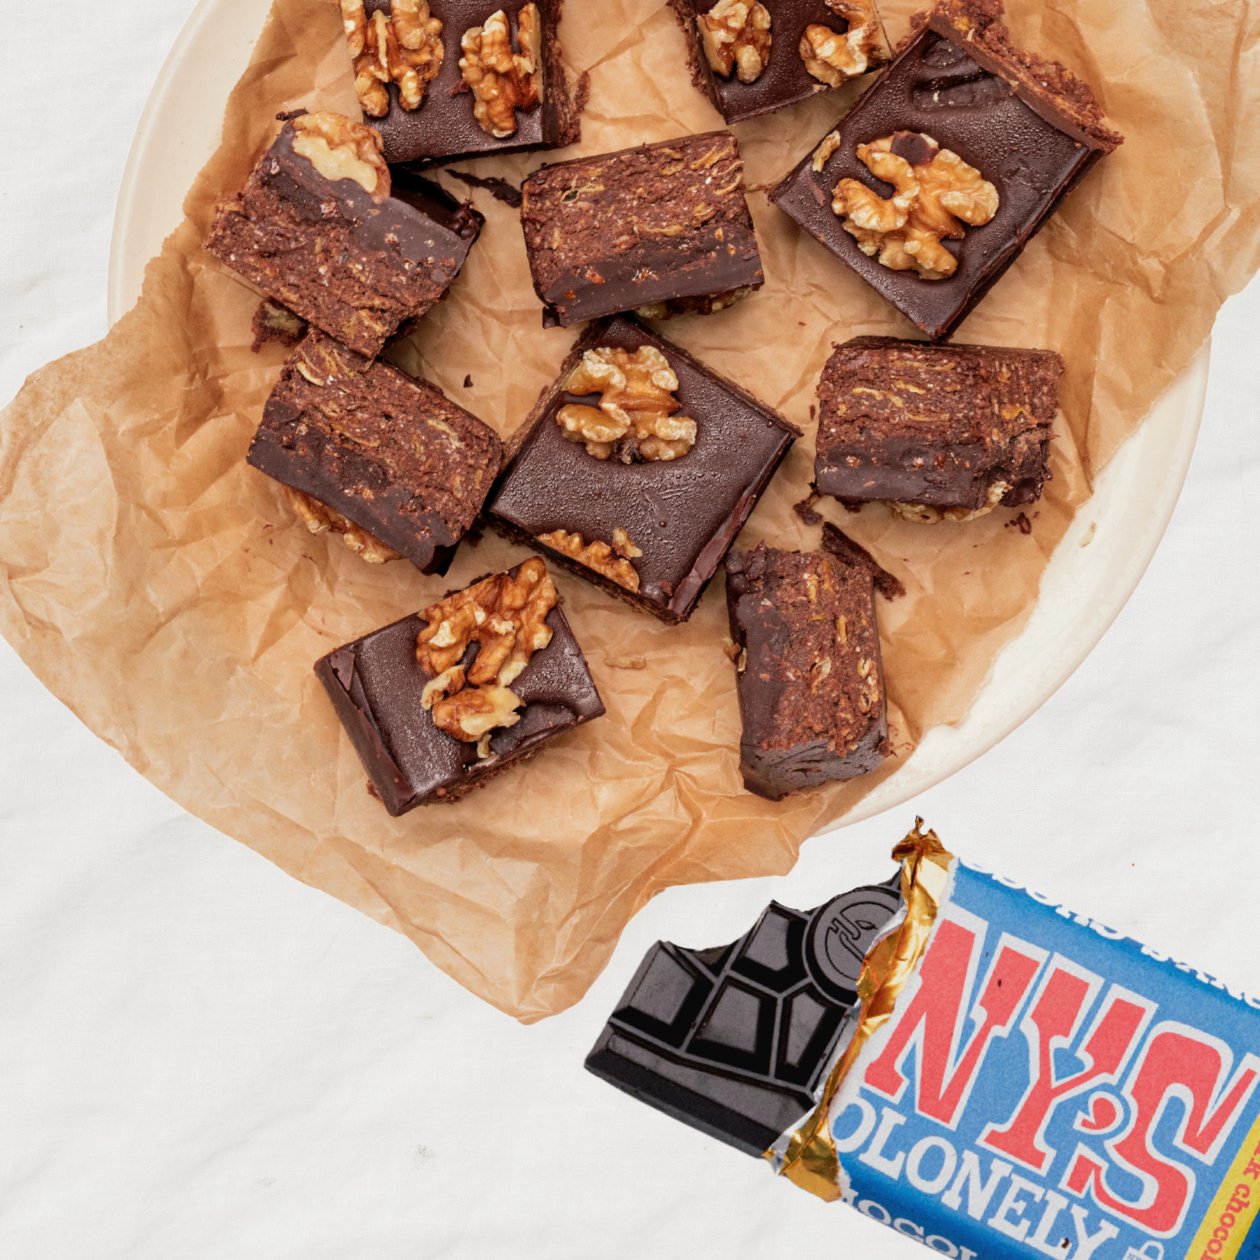
Recipe by Kelly GibneyThis delicious, indulgent jumble of all the most delicious things to eat is fun to make with kids. You can’t mess it up! Use this recipe as a guide and add in your favourite things. Lovely to gift and share.Ingredients: 1 x 180g bar Tony’s Chocolonely Dark Chocolate 1 x 180g bar Tony’s Chocolonely Milk Chocolate 160g marshmallows – halve if very large 8 ginger biscuits – roughly chopped 80g pistachios – roughly chopped 100g Tony’s Chocolonely White Chocolate Raspberry Popping Candy – roughly chopped ½ cup dried cranberries ½ cup toasted coconut chips To garnish: freeze-dried raspberries (optional) Method: Break the dark chocolate and milk chocolate into pieces and melt (together) in a double boiler. Stir until smooth. Place all the other ingredients in a large bowl, pour over the melted chocolate and mix well. Spoon into a slice tin lined with baking paper. Press down lightly on the top to push the slice together more. Place in the fridge to harden. Garnish with a sprinkle of freeze-dried raspberries if desired. Slice into pieces. Store in an airtight container. Share a picture of your Tony's Chocolonely creations by tagging us on Instagram @cookandnelson or Facebook @cookandnelsonnz.

Read more

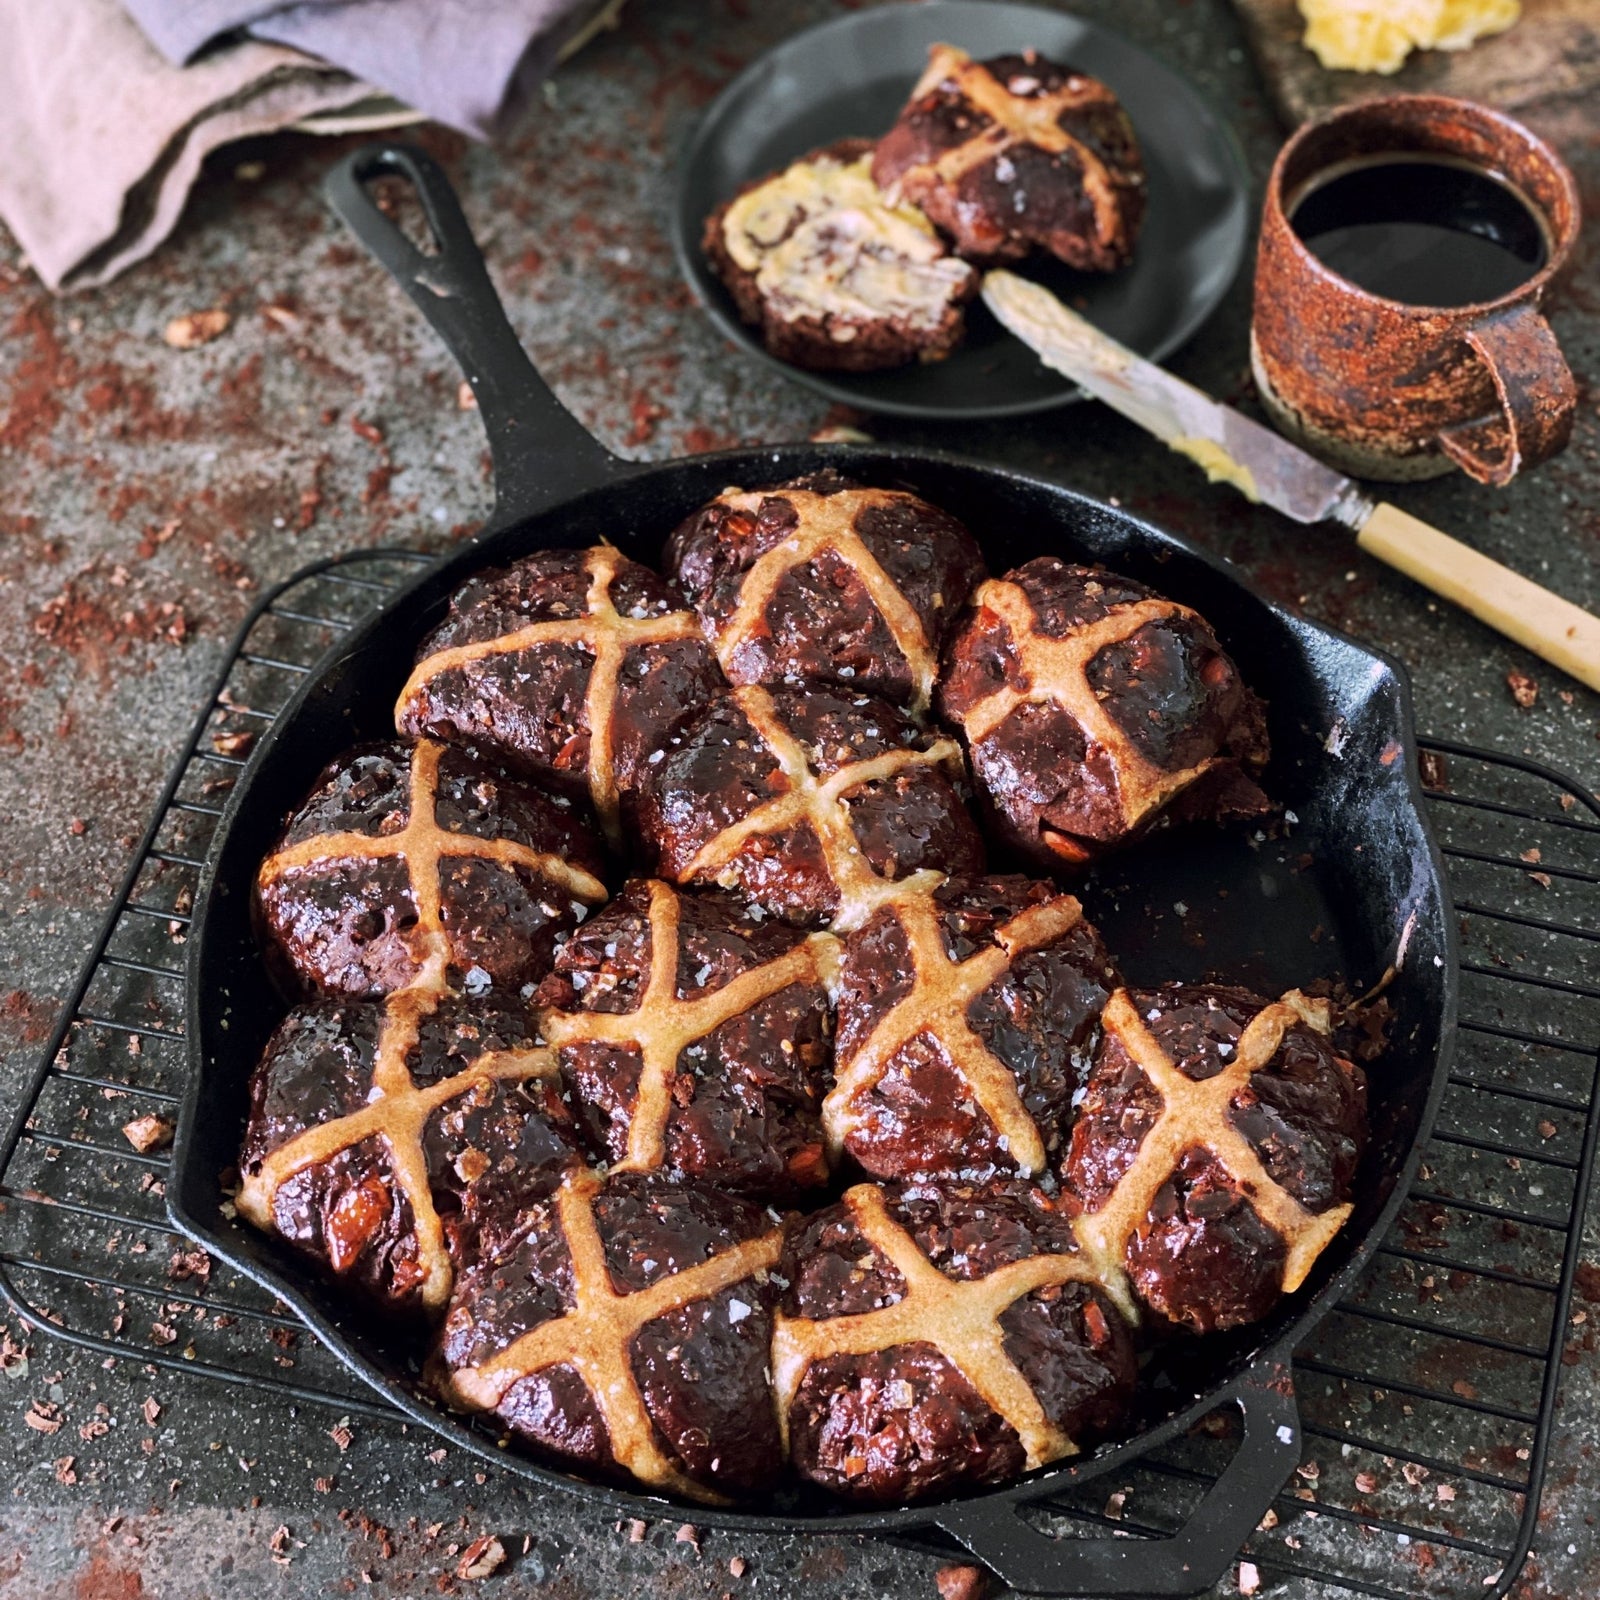
Salted Almond Chocolate Hot Cross Buns - Cook & Nelson

Salted Almond Chocolate Hot Cross Buns

This recipe celebrates all there is to love about Easter - Chocolate and Hot Cross Buns! And the combination of delicious Tony’s Chocolonely Salted Almond chocolate and Ironclad Pan toasted almonds in lots of lovely butter sets these Hot Cross Buns apart from any you’ve ever tasted. Deliciously spiced and sweet, dripping with chocolate and with the additional crunch of rock salt, they’ll have your whānau leaping out of bed as soon as they smell them cooking and begging you to make more. And the best thing about Tony’s Chocolonely chocolate? There’s not a mouthful of child slavery in any bite. We love this. Keep Easter clean by checking the chocolate you are eating is sustainably and kindly produced. It matters. From the Ironclad Pan team. Happy Easter! INGREDIENTS:YEAST SPONGE ¼ c warm milk 1 T yeast. 1 T flour 1 t brown sugar THE SALTED ALMONDS 1 c almonds, roughly chopped 75 g soft butter ½ t salt flakes THE DOUGH 2 1/2 c white flour 2 T Mixed spice 1 T cinnamon powder ¼ c cacao or cocoa powder, sifted ¼ c brown sugar ½ c glazed mixed peel, roughly chopped ¾ c warm milk 1 egg 1 t vanilla essence 170 g salted almond Tony’s chocolate, roughly chopped. Extra cacao or cocoa powder to dust. PAN PREPARATION 1 T butter 1 t salt flakes 1 t cocoa or cacao powder. PASTE ½ c water ½ c flour Salt flakes to sprinkle on top GLAZE 1 egg yolk – before the bake 2 T maple syrup – after the bake METHOD: To make the yeast sponge. In a small bowl, sprinkle yeast over the milk, flour and brown sugar, stir gently and leave for 10 minutes in a warm place, till fluffy and risen. In your Lil’ Legacy Pan melt the butter and sauté the chopped almonds and salt over a low heat for 3 minutes or until just starting to brown. The almonds will continue to cook in the pan after you have removed them from the heat. Set aside to cool. Mix all dry ingredients together then add chopped citrus peel and buttery toasted almonds and mix well. Make a well in the centre of these ingredients and add half the warm milk, the egg and vanilla essence. Whisk lightly to combine ingredients. Add the yeast sponge and the remaining milk and use a wooden spoon to combine the dry and wet ingredients. Turn the mix onto the benchtop liberally dusted with cocoa or cacao powder. The dough should be a little bit sticky. Add extra powder if the mix is sticking to the bench. Knead for 10 minutes, until the dough is shiny and elastic. Form the dough into a ball and leave to rise, covered, for an hour in a warm place. Liberally grease your Ironclad Legacy Pan with butter then dust with salt flakes and cacao or cocoa powder. The amount of salt you use is up to you! Once risen, knead the dough for a further 5 minutes. Form into a log and cut into 12 equal pieces. Using your hands, mould each piece into a ball and pat out into circles about 10cm in diameter. Evenly sprinkle the chopped chocolate in the middle of each dough circle. Seal the buns by pinching the doughy edges together firmly. Roll lightly in your hands to create a perfect bun shape then place seam side down in your prepared Ironclad Pan. Glaze the top of the buns with egg yolk and finish with a sprinkle of salt flakes. More or less depending on your tastebuds. Mix flour and water paste together, stirring well to remove all lumps and pipe a cross pattern on top of each bun. Leave to rise for 45 minutes covered in a warm place (don’t cover with a tea towel or cling film as this will ruin your crosses! I use an upturned bowl). Bake at 180°C for 30 minutes. Remove from the oven, brush with maple syrup and serve to the table hot with lashings of butter. And feel the love!

Read more

Tony’s Chocolonely Easter Bark - Cook & Nelson

Tony’s Chocolonely Easter Bark

Recipe by Kelly Gibney This is such a fun explosion of colour, texture and an absolute deliciousness. Perfect for gifting at Easter time or as a playful dessert.INGREDIENTS: 1 x 180g bar Tony’s Chocolonely Dark Chocolate 100g Tony’s Chocolonely White Chocolate Raspberry Popping Candy TO TOP: 4 Tony’s Chocolonely Eggstra special easter eggs halved Pieces of Tony’s Chocolonely chocolate – roughly chopped, use a range of dark and light flavours Handful roasted almonds – roughly chopped Handful roasted pistachio nuts – roughly chopped 1/3 cup freeze-dried raspberries 1/4 cup dried strawberry slices METHOD: Melt the dark chocolate and the white chocolate (separately) using a double boiler. Pour the dark chocolate onto a large tray lined with baking paper and spread out using a spatula. Dollop the melted white chocolate over the top – about 6 dollops. Use a chopstick or skewer to swirl the white chocolate through the dark to create areas of dark and light with swirls. Scatter the halved eggs on top, followed by the chocolate pieces. Sprinkle over the chopped nuts and lastly the freeze-dried and dried fruit. Place in the fridge for 1-2 hours until firm. Break into pieces. Store in an airtight container. Share a picture of your Tony's Chocolonely creations by tagging us on Instagram @cookandnelson or Facebook @cookandnelsonnz.

Read more

Tony's Ultimate Choc Drip Cake - Cook & Nelson

Tony's Ultimate Choc Drip Cake

Get your Easter bake-on with Georgia's Cakes ultimate Tony's choc drip cake! Flex your baking muscles with this show stopping chocolate egg-stravaganza guided by Georgia Green (@georgiascakes) INGREDIENTS: For the bottom tier 6-inch cake: for the 6 inch cake: 250g butter 250g Fairtrade caster sugar 200g (4) eggs 200g self raising flour 50g Fairtrade cocoa powder 1 tsp baking soda 150g plain yoghurt For the 2nd tier of 8-inch cake: 500g butter 500g Fairtrade caster sugar 400g (8) eggs 400g self raising flour 100g Fairtrade cocoa powder 2 tsp baking soda 400g plain yoghurt For the chocolate meringue buttercream (filling & coating for the 6 inch cake): 150g egg whites (about 5 large egg whites) 300g caster sugar 300g room temperature, unsalted butter 1 bar of Tony’s dark chocolate For the chocolate drips: 70g Tony’s dark chocolate 100ml whipping cream How to make the 6-inch cake: Preheat your oven to 170°C on fan Grease and line 2 x 6-inch cake tins Heat the butter in a saucepan on a low temperature until it's fully melted but not bubbling Combine the melted butter and the sugar in a large bowl using a whisk Add in the eggs and mix together to fully combine Sift in the flour (and baking powder if using plain flour), cocoa powder and baking soda and mix until fully incorporates Add in the yoghurt and mix in until the batter in completely smooth Evenly distribute the batter between the two tins (approx. 550g per tin) Bake for 45 - 50 minutes until the cakes are fully baked through, springing back to the touch Leave to cool completely on a cooling rack Georgia's top tip: Bake your cakes the day before decorating. Once the cakes have cooled, wrap them in clingfilm and leave at room temperature - not in the fridge. It's much easier to decorate a cake the day after it's been cooked! Less crumbs!​​​​​How to make the chocolate meringue buttercream (filling & coating for the 6-inch cake): In a stand mixer bowl or metal/glass bowl, mix the egg white and caster sugar using a rubber spatula, until fully incorporated Place the bowl over a pan of simmering water and continue mixing the sugar and egg whites with the spatula Heat up this mixture until it reaches 65°C and the sugar has completely dissolved, continuously mixing to ensure the temperature remains even throughout Place onto a stand mixer with a whisk attachment, or use an electric hand whisk and whisk the egg whites and sugar until a thick and glossy meringue has formed (approx. 5-10 minutes) Once a thick glossy meringue, leave the bowl and meringue to cool completely at room temperature Meanwhile, break up the Tony's chocolate bar into a heat proof bowl and melt the chocolate in the microwave at 30 seconds bursts or over the pan of water that you used before Once melted, leave to one side and let's finish off the buttercream! Start whisking the meringue again on a slow-medium speed Gradually add cubes of butter into the whisking meringue Once all the butter is inside the meringue, continue whisking at the same speed until it thickens and totally changes consistency (it may look like it's splitting but that's a good sign!) Turn up the speed high and whisk until the buttercream has come together and all the butter has mixed in Fold in the melted chocolate into the buttercream with a spatula until fully incorporated Georgia's top tip: if the buttercream is quite soft, place the bowl into the fridge for 10-15 minutes and then re whisk it.How to make the chocolate drips: To make the chocolate ganache drips, simply melt the chocolate and cream together. Either in the microwave at 30 second bursts or heat the cream in a small saucepan and once it's steaming, add the chocolate and let the steam of the cream melt the chocolate. The ganache should be quite loose; you may need to add more cream to achieve the correct consistency. Here's a bit more about Georgia:"I started my baking journey at Le Cordon Bleu in London where I trained in patisserie for 6 months. I always knew I didn’t want to work in a restaurant or hotel after my training, so I found myself working at a small coffee shop in London baking the fresh produce but giving it all a fancy twist. Word got out quickly that I started baking and all of a sudden people were asking me for birthday cakes. Even though I wasn’t trained in cake decorating, I took my knowledge and skills that I learnt from pastry school and applied it to cakes which gave my cakes a unique look. My cakes somewhat stood out amongst others and therefore gained popularity quite quickly which led me to launching Georgia’s Cakes in 2015 where I was selling bespoke cakes as my full time job. Over the years, my cakes were being sold in Harrods food hall in London and I worked with some very well known companies and made cakes for celebrities such as Cara Delevingne and Rihanna!""After opening my YouTube channel, I shifted my focus to teaching and now host regular cake workshops as well as sharing my recipes, tips and tricks online!"

Read more